Day 1 of the 7-Day Declutter Challenge: Transform Your Kitchen (+ Free Checklist!)

Are paper stacks piling up? Drawers refusing to close? Closets bursting at the seams?
It’s time to take back control and say goodbye to the chaos!
Decluttering your entire home can feel overwhelming. But with the 7-Day Declutter Challenge, you’ll tackle one area at a time. Your home will feel refreshed and organized by the end of the week.
How it works:
- Focus on one area of your home each day for 7 days.
- Take small, achievable steps that work with your schedule.
- Start the challenge whenever it works for you.
- Team up with a friend for accountability (and a little fun!).
Say goodbye to clutter, and hello to a home that feels calm, organized, and inviting.
Today is the day you rid yourself of anything that distracts from your best life.”
Joshua Becker
Would you like to save this idea?

Why Take On The 7-Day Declutter Challenge?
It’s no secret. We are surrounded by stuff. In fact:
- There are 53,000 storage facilities in the U.S. (more than McDonald’s & Starbucks locations combined). (source)
- 80% of the items we own are never used.

Clutter adds stress, wastes space, and overwhelms your mind. By taking on this challenge, you’ll simplify your home, create lasting organization habits, and feel more relaxed!
Before You Begin: The Four-Box Method
Start with a simple system that makes decluttering painless. Grab four boxes and label them:
- TRASH – Items that are broken, damaged, or not worth keeping.
- DONATE/SELL – Gently used items that someone else can enjoy. Decide upfront if you’ll donate or sell (or use separate boxes).
- STORE – Seasonal or sentimental items you don’t use daily, like holiday décor.
- PUT AWAY – Items you use regularly but aren’t where they belong.
Day 1: 5 Kitchen Decluttering Hacks
The kitchen often feels like clutter central. Between papers, random supplies, and way-too-many utensils, it’s time to reclaim your counters and cabinets!
1. Clear Off Countertops
Cluttered counters make your whole kitchen feel chaotic. Keep out only essentials, like the coffee maker or toaster, and store the rest.
2. Start Small and Focused
Don’t try to tackle everything at once! Start with one drawer, one cabinet, or one pantry shelf. Finish that area completely before moving on.
3. Purge What You Don’t Use
Be ruthless! Get rid of:
- Duplicate utensils
- Expired food
- Gadgets you swore you’d use (but haven’t touched in a year)
4. Use Organizers for Efficiency
Organize like a pro with bins, dividers, or shelf risers. Label everything so everyone in your home knows where things belong.
5. Use the One-In, One-Out Rule
For every new item you bring into your kitchen (like a mug, gadget, or dish), remove one item. This simple habit prevents clutter from creeping back in.
Did you know? Cluttered kitchens can lead to poor eating habits. Studies show people with extremely cluttered homes are 77% more likely to be overweight. (source)
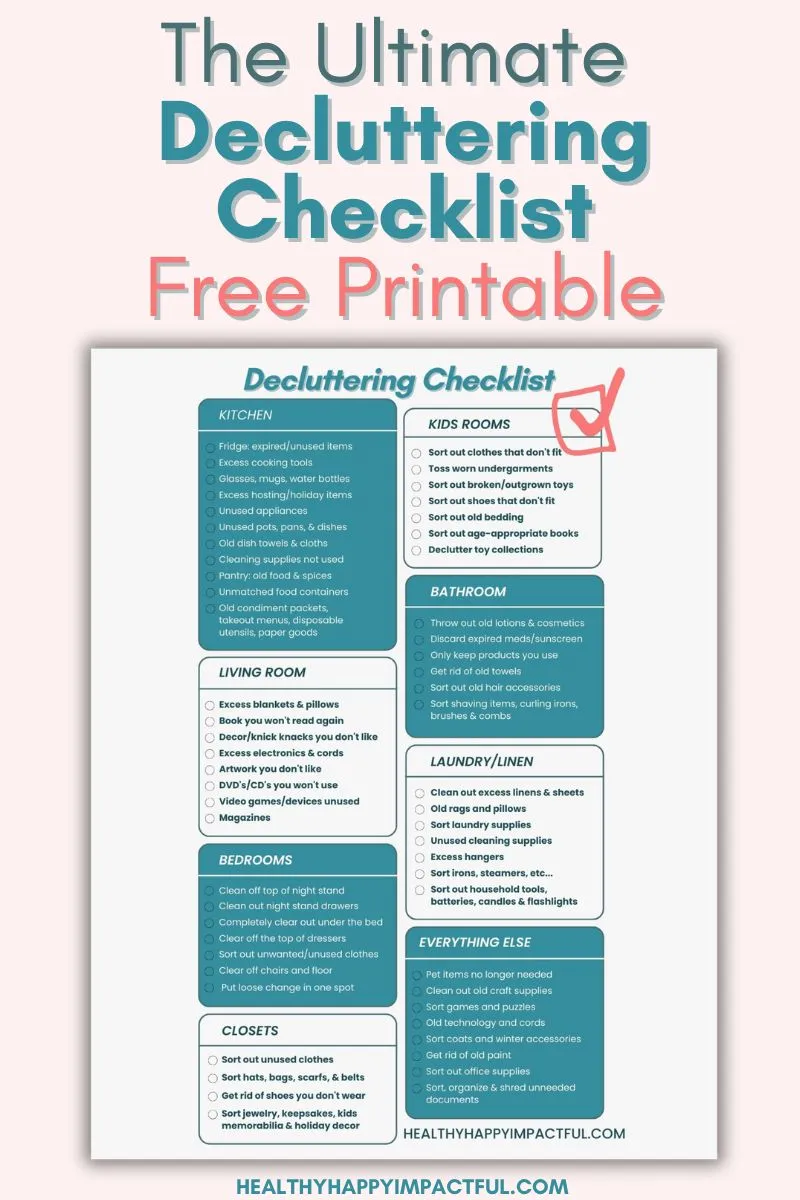
Kitchen Decluttering Checklist
Here’s your go-to guide to declutter the kitchen like a pro:
- Toss expired food from the fridge
- Donate or toss extra cooking tools
- Pare down mugs, glasses, and water bottles
- Store or donate excess hosting/holiday items
- Let go of unused appliances
- Remove pots, pans, and dishes you don’t use
- Replace old dish towels and cloths
- Toss unused cleaning supplies
- Clear our expired food and spices from the pantry
- Match food containers (bye, lids without bottoms!)
- Recycle old condiment packets, takeout menus, and disposable utensils
Free Decluttering Checklist: Download Now!
Stay on track with this free downloadable checklist to declutter every room in your home.
Print it, check it off, and celebrate your progress!

Take it one day and one area at a time. Progress over perfection!
What’s Next?
Ready to keep the declutter challenge going? Follow along for more:
- Day 2: Restore Order in the Living Room
- Day 3: Refresh Your Bedroom & Closet
- Day 4: Take Control of Kids’ Spaces
- Day 5: Streamline the Bathroom
- Day 6: Simplify the Laundry Room
- Day 7: Tackle the Final Clutter Zones
Stay tuned! Your clutter-free home is just 7 days away!

